Have you ever turned a perfectly attractive sticker into a twisted clump or a wrinkled eyesore? Here are some tips and tricks that will help you apply your stickers with ease every time!
Tip 1: Start With A Clean Surface
Pre-wash the area where you’ll be applying the sticker using either soap and water or a mixture of rubbing alcohol (70% isopropyl alcohol) and water—we recommend a 50 / 50 water / alcohol solution. After cleaning with soapy water, rinse thoroughly with water until no soap or residue remains. Do not use window-cleaning products. They may leave a residue behind, making your sticker cling less effectively.
Tip 2: Apply When Temperatures Are Moderate
For the best results, install your stickers in a shaded area away from direct sunlight. When possible, you should apply stickers when the temperature is above 50°F and below 90°F.
Tip 3: Use Masking Tape
Masking tape can help ensure that your sticker is positioned exactly where you want it. Leaving the white backing paper in place and facing the surface you’re applying it to, position the sticker where you want it to go. Place a piece of masking tape along the top edge of the sticker—this fixes it in the proper location. Then, lift the sticker as if it’s on a hinge, and peel off the backing paper. While holding onto the bottom edge, slowly lower the sticker, using the thumb of your other hand to press from the center out and gradually working your way from top to bottom.
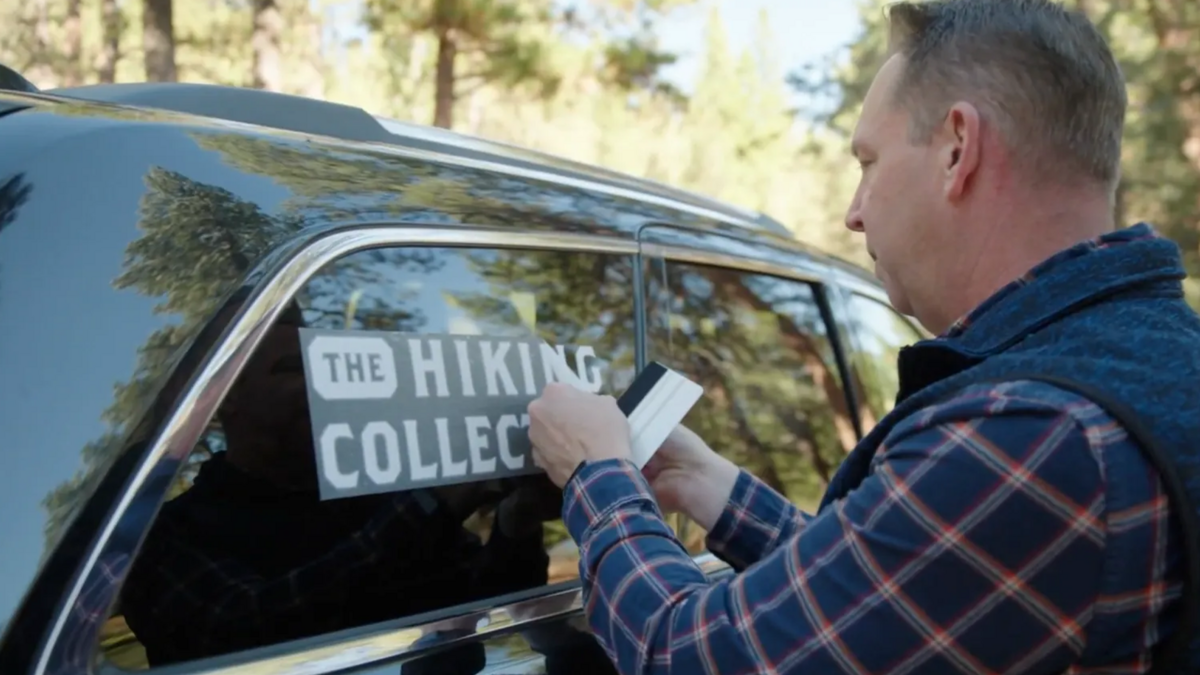
Tip 4: Use The Wet Method
You can apply most smaller decals without using water, but for large and very large stickers, this trick is a life-saver. After cleaning your surface area, wet the area again using a spray bottle and a solution of about 5% soap / 95% water. Apply the sticker while the area is still wet. This will keep it from adhering immediately and give you time to reposition if necessary. It also enables you to remove any bubbles using a squeegee or a plastic card. The soapy water will dry in a few minutes and leave your sticker firmly affixed.
Tip 5: Tend To The Transfer Tape
Our transfer stickers come with three layers:
1) Transfer tape: the clear top layer that clings to the non-adhesive side of the sticker and holds the sticker together.
2) The Sticker: the middle layer.
3) Backing Paper: the bottom layer of white paper that clings to the adhesive side of the sticker.
Before applying these types of stickers, it’s important to make sure the sticker and transfer tape are pressed firmly together. To do so, apply pressure evenly across the transfer tape with a squeegee or a plastic card. This will ensure that the sticker doesn’t come up with the backing paper during installation.
Also, once you’ve applied your sticker, be sure to leave the transfer tape in place for at least 3 hours and up to 24 hours before gently removing it. In very cold winter months, you may need to leave the transfer tape on even longer. To speed up the process when it’s cold out, you can warm the application surface using a blow dryer on low heat.
Now that you know the tricks the experts use for applying stickers, you should be able to get it right every time! But just in case you want even more information, you can find step-by-step instructions and more tips at our Sticker Installation Guides.


